Are you looking to build a dynamic website from scratch without breaking the bank? WordPress is an excellent choice for creating a powerful and versatile website, and the best part is, it can be done for free. In this article, we will guide you through the step-by-step process of building a dynamic website using WordPress, without any coding knowledge required. Let's get started! Table of Contents Introduction to WordPress Setting Up Your Local Development Environment Installing WordPress Choosing a Theme Customizing Your Website Design Adding Essential Plugins Creating Pages and Navigation Setting Up a Blog Optimizing Your Website for SEO Enhancing Functionality with Plugins Securing Your Website Testing and Launching Your Website Maintaining and Updating Your Website Monetizing Your Website Conclusion 1. Introduction to WordPress WordPress is a popular content management system (CMS) that allows users to create and manage websites easily. It offers a user-friendly interface, a wi...
How to Redirect HTTP to HTTPS in WordPress
Table of Contents
- Introduction
- Understanding HTTP and HTTPS
- The Importance of HTTPS
- Setting up an SSL Certificate
- Configuring WordPress for HTTPS
- Implementing HTTP to HTTPS Redirection
- Verifying the Redirection
- Troubleshooting Common Issues
- Updating Internal Links and Resources
- Updating Search Engine Preferences
- Monitoring and Maintenance
- Conclusion
- FAQs
Introduction
In today's digital landscape, website security is of paramount importance. One crucial aspect of securing a website is to ensure that all communication between the user's browser and the website is encrypted. This is where HTTPS comes into play. In this article, we will explore how to redirect HTTP to HTTPS in WordPress, making your website more secure and trustworthy.
Understanding HTTP and HTTPS
HTTP, which stands for Hypertext Transfer Protocol, is the standard protocol for communication on the World Wide Web. It transmits data between a web server and a web browser. However, the problem with HTTP is that the data transmitted is not encrypted, making it susceptible to interception and modification.
HTTPS, on the other hand, is an extension of HTTP that adds an extra layer of security through encryption. It utilizes an SSL (Secure Sockets Layer) certificate to encrypt the data transmitted between the server and the browser, ensuring privacy and data integrity.
The Importance of HTTPS
Using HTTPS has become increasingly important for several reasons. Firstly, it enhances the security and privacy of your website visitors. With HTTPS, any data exchanged between the user and the website remains confidential, protecting sensitive information such as passwords and credit card details.
Secondly, HTTPS is now considered a ranking factor by search engines. Websites that implement HTTPS are more likely to rank higher in search engine results, improving their visibility and attracting more organic traffic.
Lastly, modern web browsers display warnings for websites that do not use HTTPS, alerting users that the connection may not be secure. This can lead to a loss of trust and potential visitors abandoning your website.
Setting up an SSL Certificate
Before redirecting HTTP to HTTPS, you need to obtain an SSL certificate. An SSL certificate is a digital certificate that verifies the identity of a website and enables secure communication. There are several types of SSL certificates available, including free and paid options. Choose the one that suits your needs and budget.
You can obtain an SSL certificate from a trusted certificate authority (CA) or through your web hosting provider. Many hosting providers offer automated SSL certificate installation, simplifying the process for you.
Configuring WordPress for HTTPS
Once you have obtained an SSL certificate, it's time to configure your WordPress website to use HTTPS. Follow these steps:
- Log in to your WordPress admin dashboard.
- Navigate to the "Settings" menu and click on "General."
- Update the "WordPress Address (URL)" and "Site Address (URL)" fields to use HTTPS instead of HTTP.
- Save the changes.
By updating the URLs, you ensure that all the internal links and resources on your website will be served over HTTPS.
Implementing HTTP to HTTPS Redirection
To redirect HTTP to HTTPS in WordPress, you can utilize a plugin or modify the .htaccess file. Let's explore both options:
Option 1: Using a Plugin
- Install and activate an SSL plugin such as "Really Simple SSL" or "SSL Insecure Content Fixer."
- Once activated, the plugin will automatically detect your SSL certificate and handle
- the redirection process.
Option 2: Modifying the .htaccess File
- Access your website's files using an FTP client or file manager provided by your hosting provider.
- Locate the
.htaccessfile in the root directory of your WordPress installation. - Open the file and add the following code at the beginning:
<IfModule mod_rewrite.c>
RewriteEngine On
RewriteCond %{HTTPS} off
RewriteRule ^(.*)$ https://%{HTTP_HOST}%{REQUEST_URI} [L,R=301]
</IfModule>- Save the changes and upload the modified
.htaccessfile back to the server.

Option 3: Modifying the httpd-prefix.config File
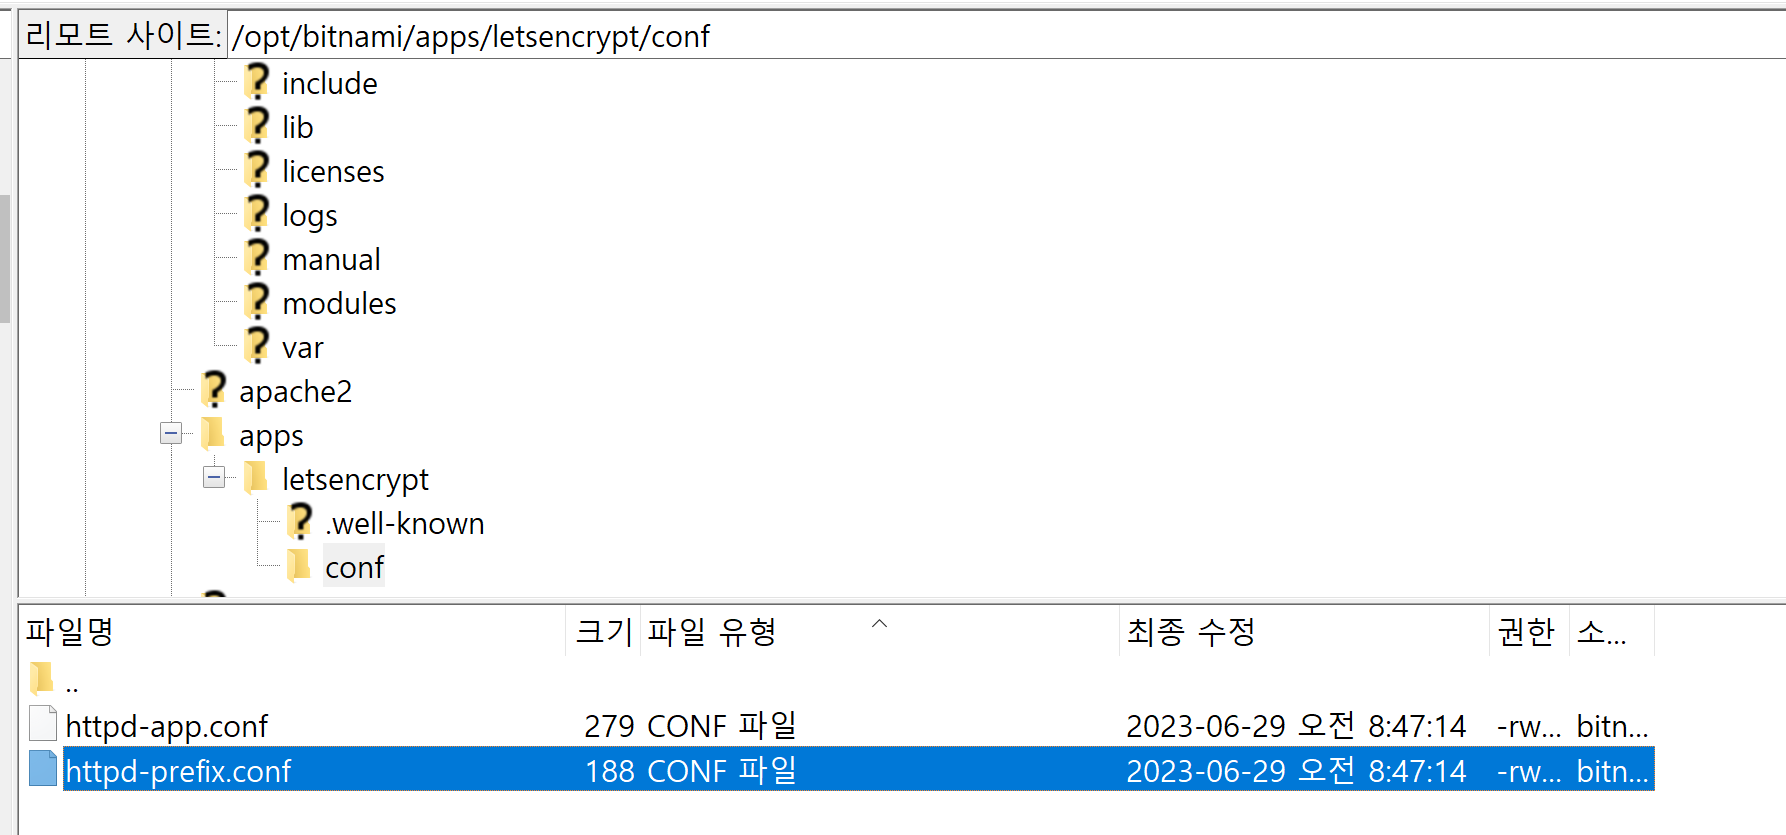
In my case, I am running a multi-site, and I installed SSL through AWS Lightsail - Bitnami. So, I changed the htaccess file, but https was not applied. So, I added the below code to the httpd-prefix.conf file.
RewriteEngine On
RewriteCond %{HTTPS} off
RewriteRule ^(.*)$ https://%{HTTP_HOST}%{REQUEST_URI} [L,R=301]
Verifying the Redirection
Once you have implemented the HTTP to HTTPS redirection, it's crucial to verify its effectiveness. Follow these steps to ensure the redirection is working correctly:
- Clear your browser cache and cookies.
- Open your website using the old HTTP URL.
- The browser should automatically redirect to the new HTTPS URL.
- Verify that the SSL padlock icon is displayed in the browser's address bar, indicating a secure connection.
Troubleshooting Common Issues
While redirecting HTTP to HTTPS is usually a straightforward process, you may encounter some common issues. Here are a few troubleshooting tips:
- Mixed Content Warnings: Ensure that all resources (images, scripts, stylesheets) on your website are loaded over HTTPS. Update any hardcoded URLs to use HTTPS.
- Redirect Loop: Check your redirection rules or plugins to ensure they are correctly configured. Avoid conflicting redirection rules.
- Insecure Content: Make sure all external resources (iframes, embedded videos) are also served over HTTPS.
Updating Internal Links and Resources
After implementing HTTPS, it's important to update all internal links and resources to reflect the new protocol. This includes updating links within your content, image URLs, and any references to external scripts or stylesheets.
By updating these links, you ensure that your website operates seamlessly over HTTPS and avoids mixed content warnings.
Updating Search Engine Preferences
To inform search engines about the change from HTTP to HTTPS, it's essential to update your website preferences accordingly. Follow these steps:
- Log in to your Google Search Console account.
- Add your website property if it's not already added.
- Go to the "Settings" menu and click on "Change of Address."
- Follow the instructions to submit the new HTTPS version of your website.
This process helps search engines update their index and ensures a smooth transition without losing your rankings.
Monitoring and Maintenance
Once you have successfully redirected HTTP to HTTPS in WordPress, it's important to monitor your website for any potential issues. Regularly check for mixed content warnings, monitor your website's performance, and keep your SSL certificate up to date.
Maintaining a secure website not only protects your users but also boosts your online presence and credibility.
Conclusion
In this article, we explored the process of redirecting HTTP to HTTPS in WordPress. By implementing HTTPS on your website, you enhance security, improve search engine rankings, and establish trust with your visitors. Remember to obtain an SSL certificate, configure WordPress for HTTPS, implement the redirection, and verify its effectiveness. Update internal links, inform search engines, and monitor your website to ensure a secure and seamless user experience.
FAQs
1. Do I need an SSL certificate if my website doesn't handle sensitive information?
Yes, implementing HTTPS with an SSL certificate is recommended for all websites, regardless of whether they handle sensitive information. It enhances security, improves trust, and positively impacts search engine rankings.
2. Can I obtain an SSL certificate for free?
Yes, there are free SSL certificate options available, such as Let's Encrypt. However, paid certificates may
offer additional features and support.
3. Will redirecting from HTTP to HTTPS affect my SEO rankings?
In general, implementing HTTPS and redirecting from HTTP to HTTPS can positively impact your SEO rankings. Search engines consider HTTPS as a ranking signal and prioritize secure websites in search results.
4. How long does it take for search engines to update their index after the change to HTTPS?
The time it takes for search engines to update their index varies. It can range from a few days to several weeks. You can expedite the process by submitting the change through the Google Search Console's "Change of Address" tool.
5. What should I do if I encounter mixed content warnings after implementing HTTPS?
If you encounter mixed content warnings, you need to update all internal links and resources to use HTTPS. Ensure that all images, scripts, stylesheets, and external resources are loaded securely to avoid mixed content issues.
Comments
Post a Comment